

Painting a ceiling can be an effective way to transform a room, whether you’re giving it a fresh coat of paint or adding a new color to create a statement. However, the task can be daunting for those who have never done it before. The idea of reaching up, and getting paint all over yourself and the room can be overwhelming, but with the right tools and techniques, painting a ceiling can be a straightforward and satisfying DIY project. In this step-by-step guide, we will take you through the entire process of painting a ceiling, from preparing the space to applying the final coat. We’ll cover essential topics such as selecting the right paint, preparing the surface, and ensuring that the paint job is flawless. We’ll also provide you with tips and tricks for avoiding common mistakes and achieving a professional-looking finish.

Whether you’re painting a small bedroom ceiling or a larger living room ceiling, this guide will walk you through the process, so you have everything you need to know before starting your project. We’ll cover all the essential steps, including preparing the surface, taping and covering furniture, priming, and painting, as well as tips for cleaning up when the job is done. By the end of this article, you’ll have the knowledge and confidence you need to tackle any ceiling painting project with ease. So, grab your paintbrush, and let’s get started on transforming your room with a fresh new look!
Table of Contents
Why Is It Very Challenging To Paint The Ceiling?
Painting the ceiling can be a difficult task for several reasons. First and foremost, it can be physically demanding, especially if you are not used to working overhead for an extended period. Holding your arms up for an extended period can cause fatigue and muscle strain, which can make the job uncomfortable and challenging.
Additionally, painting a ceiling can be messy, with the potential for paint to drip and splatter onto walls, furniture, and floors. This can make the task time-consuming as you’ll need to take extra precautions to protect your room.
Another challenge is working with the height of the ceiling. Depending on the room’s size and layout, you may need a ladder or scaffolding to reach the ceiling. This can be dangerous, especially if you are not experienced with using this equipment.
Finally, achieving a smooth and even finish can be challenging, especially if you are not using the right techniques or tools. Uneven coverage, brush or roller marks, and drips can all detract from the finished product, which can be frustrating for anyone looking to create a polished look.
Painting Your Ceiling To Perfection- Essential Steps To Follow
Just as mentioned earlier, painting your ceiling perfectly can be a challenging task. But you need not worry because in this article we will walk you through all the essential steps to painting your ceiling perfectly.
Step 1: Prepare the space
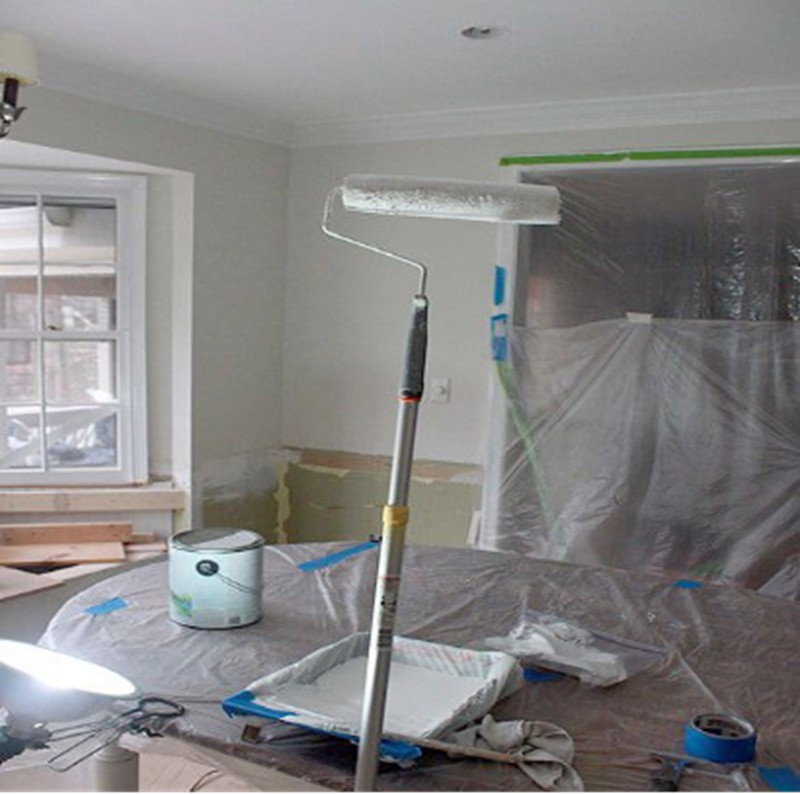
Preparing the space is a critical step when painting the ceiling, as it can significantly impact the final result of the project. It helps to protect the surrounding surfaces, such as walls, floors, and furniture, from paint splatters or drips. By covering or removing these items, you can avoid any accidental damage to them during the painting process. Also, proper preparation ensures that the ceiling surface is clean, dry, and smooth before painting.
Here are the important things to do while preparing to paint your ceiling:
- The first thing is to remove all furniture and fixtures from the room or cover them with drop cloths to protect them from paint splatters. This includes removing light fixtures, ceiling fans, and any other items that could get in the way of painting.
- Next, it’s important to clean the ceiling thoroughly, as any dust or debris left on the surface can affect the adhesion of the paint. A simple solution of water and mild detergent can be used to clean the ceiling, and it’s important to let it dry completely before starting to paint.
- If there are any cracks or holes in the ceiling, they should be filled and sanded down before painting to ensure a smooth and even surface. It’s also important to tape off any areas where the ceiling meets the walls or trim to avoid getting paint on them.
- Finally, it’s important to choose the right tools for the job, such as a sturdy ladder or scaffolding for high ceilings, and high-quality brushes and rollers for a professional finish. With proper preparation, painting a ceiling can be a straightforward and rewarding project that can transform the look of a room.
Overall, preparing the space for ceiling painting is an important step in any painting project. It helps to protect your surroundings, ensures a smooth and even finish, and allows you to use the right tools and materials for the job, resulting in a beautiful and long-lasting paint job.
You can check this video on YouTube to know more about how to prepare your space before painting the ceiling:
Step 2: Apply painter’s tape
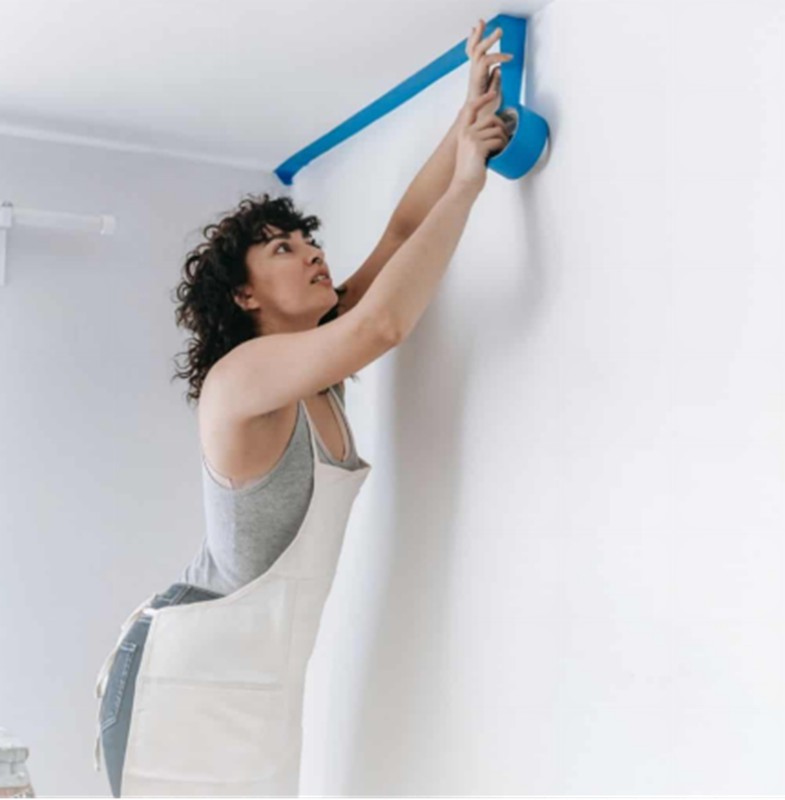
Applying painter’s tape when painting the ceiling is an important step that can help ensure a clean and professional-looking finish. The first step is to select the right type of painter’s tape for the job. Look for a tape that is specifically designed for use on ceilings and has a strong adhesive that will stick to the surface without peeling or lifting. Before applying the tape, make sure the ceiling is clean and free of any debris or dust. Begin by measuring and marking the area where you want to apply the tape.
Next, apply the tape along the edge of the area to be painted, making sure to press it firmly into place to prevent any paint from bleeding through. When applying the tape, it is important to avoid stretching or pulling it too tightly, as this can cause it to lift or tear. Once the tape is in place, use a putty knife or credit card to smooth out any bubbles or wrinkles.
After you have finished painting and the paint is dry, carefully remove the tape at a 45-degree angle to avoid pulling up any paint along with it. With a little bit of care and attention, using painter’s tape when painting the ceiling can help you achieve a clean, professional-looking finish.
If you need some more guidance on how to apply painter’s tape, check out the following video on YouTube:
Step 3: Prime the ceiling
Priming the ceiling before painting involves applying a coat of primer to the surface to create a smooth and even base for the paint to adhere to. Priming helps to seal the surface, making it less porous and more resistant to moisture, which can cause paint to bubble or peel. By priming the ceiling, you can also hide any imperfections, such as cracks or stains, and create a more uniform appearance. This is particularly important if you are painting over a darker color or a heavily textured surface.
Priming the ceiling can make painting easier and result in a more perfect finish because it allows the paint to go on smoothly and evenly. This is because primer fills in any small gaps or imperfections in the surface, creating a smooth and even base for the paint to adhere to. This can also save you time and money in the long run because you won’t need as many coats of paint to achieve the desired finish.
Here are the steps you can follow when priming your ceiling before painting it:
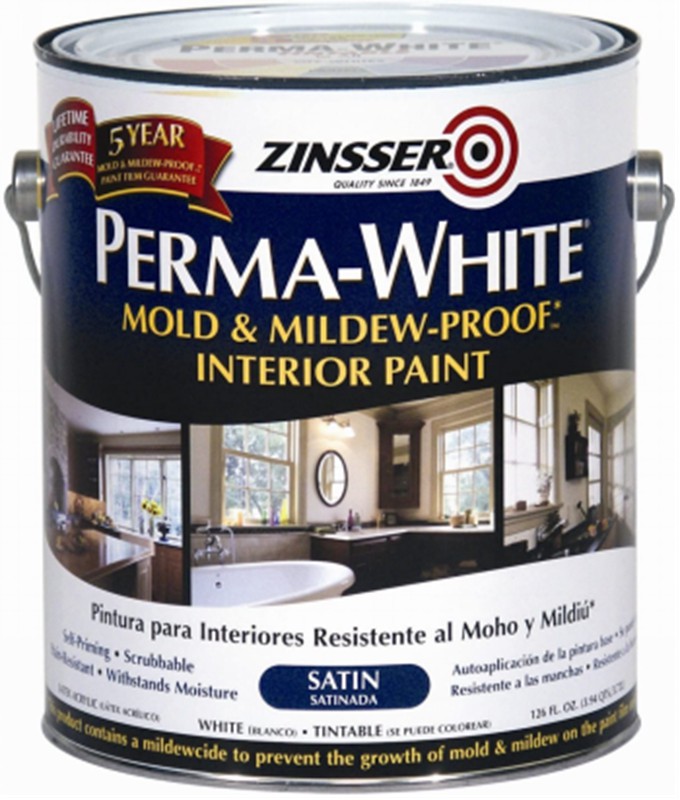
- Select a primer that is specifically designed for ceilings. Look for one that is labeled as a stain-blocking primer to prevent any stains or discoloration from bleeding through.
- Stir the primer thoroughly to ensure that it is well-mixed.
- Use a paint roller with an extension pole to apply the primer in a thin, even coat. Start at one corner of the ceiling and work your way across in small sections. Use a brush to cut in around the edges of the ceiling.
- Follow the manufacturer’s instructions for drying time, which is typically around 24 hours.
- Use a fine-grit sandpaper to sand the surface of the primer lightly. This will create a smooth surface for the paint to adhere to.
- Use a soft cloth or a vacuum cleaner to remove any sanding dust from the ceiling.
- Once the primer has dried and been sanded, you can apply your paint as usual.
Priming the ceiling before painting is an important step that can help ensure a smooth and even finish and make the painting process easier and more efficient.
Want to see how this process is done? You can watch the following video on YouTube:
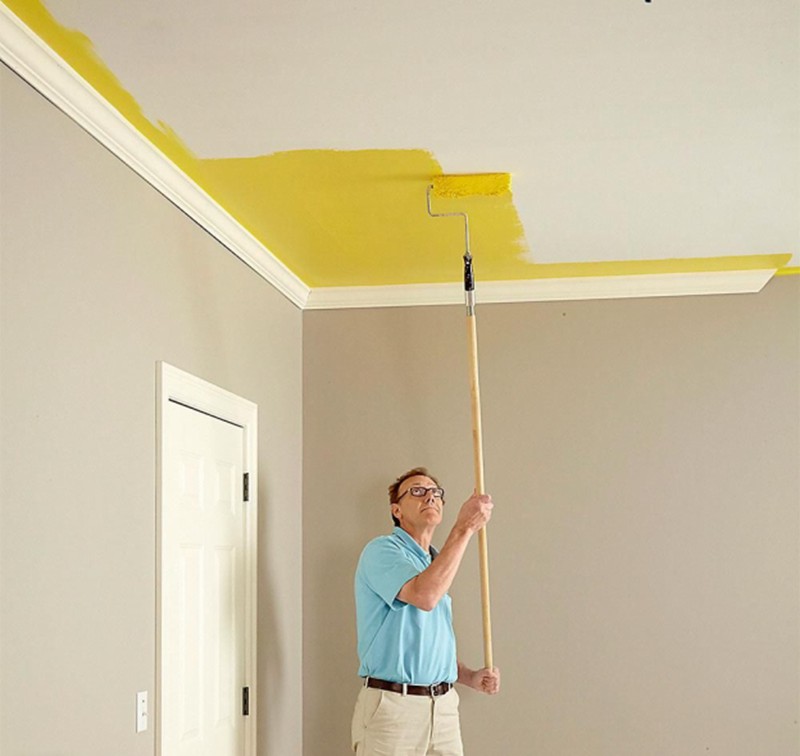
Step 4: Apply the first coat of paint to the ceiling
Applying the first coat of paint to a ceiling is a crucial step in the process of painting it. Proper preparation and technique can ensure a smooth and even finish that will last for years to come.
Before beginning, it is important to gather all necessary materials, including paint, brushes, rollers, trays, and drop cloths. The ceiling should be clean and free of any debris or dust. Any cracks or holes should be filled and sanded down to create a smooth surface.
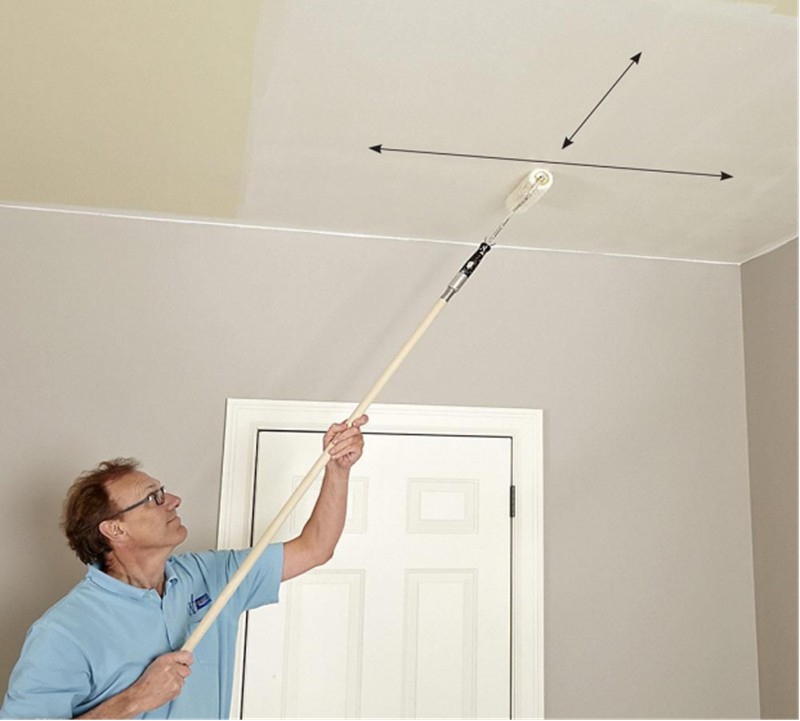
To begin, it is recommended to cut in the edges of the ceiling with a brush. This involves painting the edges of the ceiling, where it meets the walls, to create a clean line. Once the edges are done, a roller can be used to apply the first coat of paint to the rest of the ceiling.
When using a roller, it is important to work in small sections, applying the paint in a W pattern. This ensures even coverage and helps to prevent drips. It is also important to use a light touch when rolling, as pressing too hard can cause roller marks and an uneven finish.
After the first coat has been applied, it is recommended to wait at least four hours before applying a second coat. This allows the paint to dry and cure properly, ensuring a long-lasting finish.
Step 5: Apply the second coat
Once the first coat is completely dry, it is time to apply the second coat. This coat should be applied in the same manner as the first coat, using a roller or brush to evenly distribute the paint across the ceiling. It is important to use the same type of paint and the same color as the first coat to ensure consistency.
One of the main benefits of applying a second coat of paint to the ceiling is that it helps to hide any imperfections or inconsistencies in the first coat. The second coat also provides added durability and protection against wear and tear, which is especially important in high-traffic areas such as kitchens and bathrooms.
When applying the second coat, it is important to pay attention to any drips, sags, or bubbles that may occur. These can be easily fixed by lightly sanding the affected area and applying a small amount of paint to blend it in with the surrounding area.
Applying a second coat of paint to a ceiling is a crucial step in achieving a professional-looking finish. It provides added durability and protection, while also ensuring that any imperfections in the first coat are rectified. By following the proper technique and taking care to avoid any mistakes, you can achieve a beautiful, long-lasting finish on your ceiling.
To see how to properly apply paint to the ceiling, watch the following video on YouTube:
Step 6: Clean up
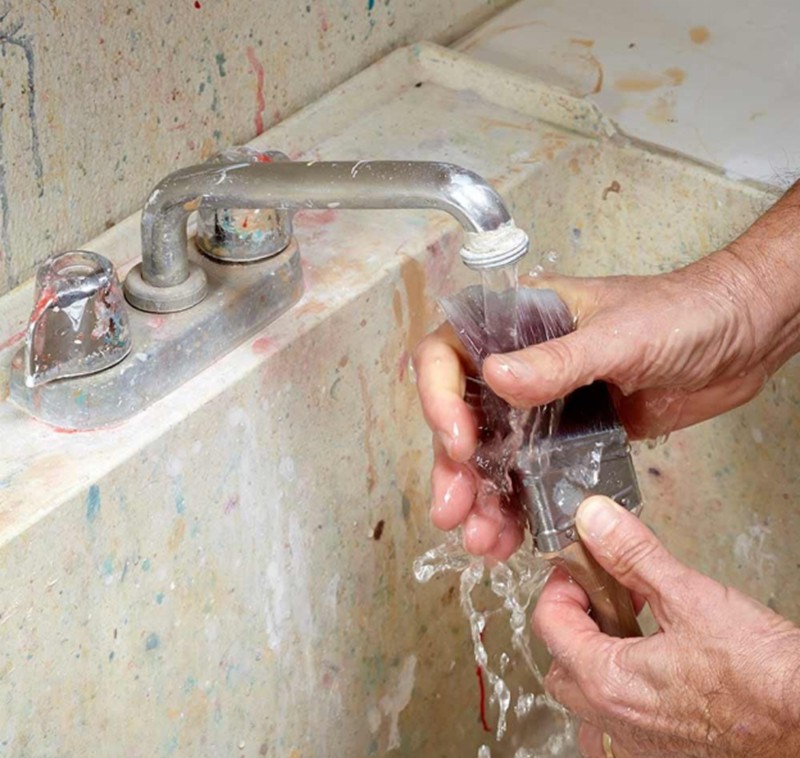
After painting the ceiling, it is important to properly clean up to ensure a tidy and safe workspace. First, remove any drop cloths, painter’s tape, or other materials used during the painting process. Then, use a damp cloth or sponge to wipe down any surfaces that may have gotten splattered with paint, such as walls or furniture.
Next, dispose of any used paint cans, brushes, and rollers according to your local regulations. If there is any leftover paint, make sure to store it properly in a sealed container for future touch-ups.
Finally, clean your painting tools thoroughly using soap and water or the appropriate cleaning solution recommended by the paint manufacturer. This will help prolong the life of your brushes and rollers and ensure that they are ready for use the next time you need them.
If you want to know more about how to clean up properly after any painting project, you can check out this video on YouTube:
Conclusion
Painting a ceiling can be a challenging task, but with the right tools and techniques, it can be accomplished. The key steps include preparing the room and surface, selecting the right paint and tools, applying the paint in a consistent and even manner, and applying a second coat for a smooth and durable finish. Proper cleanup is also essential for maintaining a safe and tidy workspace. By following these steps, you can achieve a professional-looking finish on your ceiling and enhance the overall look and feel of your room.