Brick painting is a cost-effective way to update the appearance of your home. You can transform the exterior of your home in a matter of days if you have the right tools and skills.
However, brick painting is more complicated than slapping paint with a brush. You must know some essential tips and tricks to achieve a professional appearance.
Bricks are porous, absorbing moisture from the air and rainwater runoff. Unfortunately, this means they will begin to crack and chip away at the surface of each block in your wall or foundation over time.
Applying a protective layer of paint on top of them every few years (or whenever necessary) can help delay this process.
Many different types of paints are available on the market today. However, there are two main types: oil-based or latex/acrylic-based paints, which differ in composition, drying time, and other characteristics such as texture or shine level.
Whether you want to change the color of your home’s exterior or conceal unsightly stains or damage. This article will teach you everything you need to know about brick painting, from selecting the right paint and tools to preparing and painting your bricks.
Table of Contents
Tools Required for Brick Painting
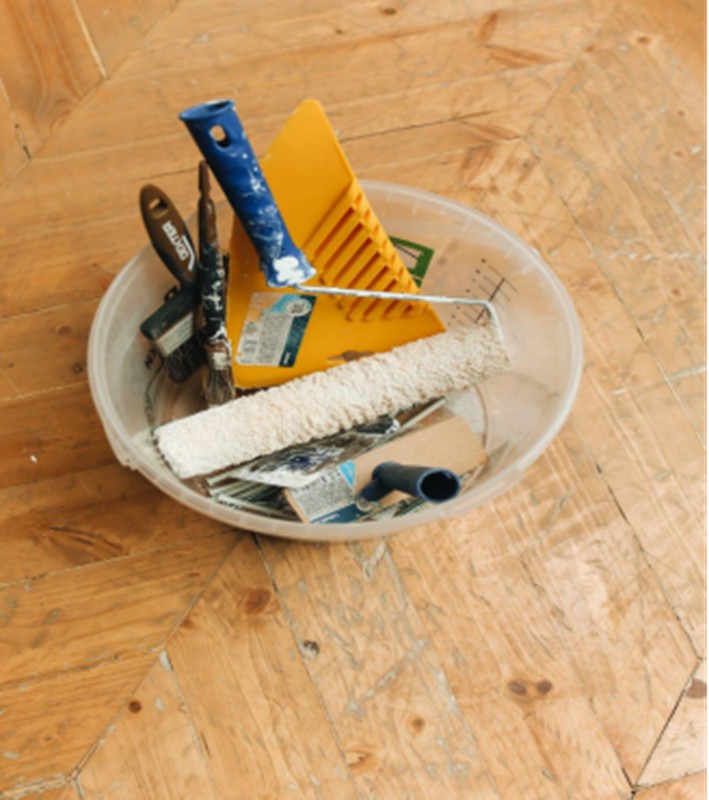
It is critical to have the proper tools before painting your brick. Here are some of the tools you’ll need for brick painting:
| Tool | Purpose |
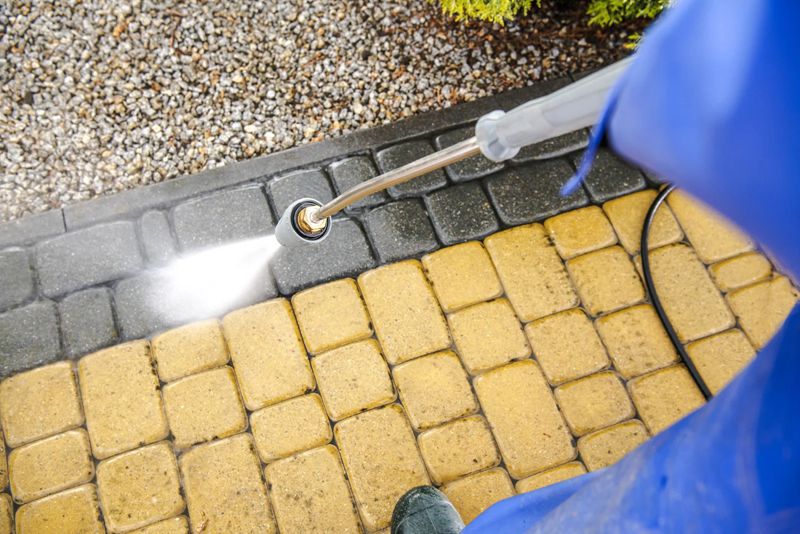
| Pressure Washer | Used to clean the brick to prepare it for painting. |
| Paint Scraper | Gets rid of any loose paint on the brick. You can also use the scraper to remove any dirt or debris that the pressure washer could not remove.
|
| Paintbrushes | A smaller brush is ideal for painting edges and corners, whereas a larger brush is ideal for painting larger areas. |
| Paint Roller | Ideal for painting large brick areas. It is also suitable for applying primer coats. |
| Paint Sprayer | This can be used to paint a large area. It is also great for applying a sealer coat to the brick.
|
| Paint | Brick paints are specifically designed for use on brick. Choose a paint type that is breathable and allows moisture to escape. |
Basic Brick Painting Tips
Painting brick can be daunting, but with proper preparation and approach, you can help transform the appearance of your home or building.
● Evaluate the Condition of the Brick
Examine the brick for cracks, chips, or areas of damage that require repair. If found, these areas should be addressed before beginning the painting process.
● Clean the Brick
The next step is to clean the surface thoroughly once the brick is in good condition. This can be done with a pressure washer or a soap and water solution. Removing dirt, grime, or loose debris from the surface ensures the paint adheres properly.
● Allow to Dry
After cleaning, the surface should dry completely before painting. Applying paint to a damp surface can cause the paint to peel or bubble.
● Prime the Surface
Once the brick is dry, prime the surface with a high-quality masonry primer. Priming ensures that the paint adheres properly and provides a smooth finish.
● Choose the Right Product
Choosing high-quality paint designed for masonry surfaces is critical to the outcome of your project. Low-quality paint can easily chip or peel, causing damage to the brick surface. It is also essential to choose a color that complements the surrounding area and enhances the overall appearance of the building.
Selecting the Right Paint for Your Brick
Selecting the right paint is critical for achieving a professional look when painting bricks. First, select a paint designed specifically for masonry surfaces. These paints are designed to provide superior durability and coverage on porous surfaces such as brick.
When selecting paint, pay attention to the finish as well. For example, if you’re painting the exterior of your home or a high-traffic area, opt for a glossy or semi-gloss finish that is easy to clean and maintain.
On the other hand, if you’re painting a brick fireplace or an accent wall, a matte or eggshell finish may be more appropriate for a subtle, textured look.
It’s important to note that not all paints are created equal, and investing in high-quality paint will significantly improve the longevity and appearance of your project.
Look for paints that are fade-resistant and weather-resistant, as well as have excellent adhesion, to ensure that your painted bricks look great for years.
Ensure to consider the paint color you intend to use as well. Many alternatives are available, whether you want to match the brick’s current color or select a daring new hue to draw attention.
You’ll be on your way to painting bricks professionally by selecting the appropriate paint for your project.
How to Clean Bricks Properly Before Painting
Cleaning the bricks thoroughly before painting ensures a professional and long-lasting finish. It is vital to remove any dirt, grime, or loose debris accumulated on the brick’s surface.
Step 1: Scrub the Bricks
Scrub the bricks and remove any loose debris with a stiff-bristled brush. This will also help to highlight any areas that need more attention.
Step 2: Clean the Bricks
A cleaning solution designed explicitly for bricks is required. These solutions are widely available in most hardware stores. They will aid in the removal of any stubborn stains or discolorations on the surface of the bricks.
To avoid potential hazards, follow the cleaning solution directions carefully and wear protective gloves and goggles.
Step 3: Allow to Dry
After thoroughly cleaning the bricks, you should allow them to dry completely before painting. A good rule of thumb is to wait at least 24 hours before painting to ensure the bricks are completely dry.
While cleaning the bricks before painting may appear unnecessary, it is important to ensure that the paint adheres properly and provides a smooth, even finish.
By properly preparing the surface of the bricks, you will achieve a professional-looking result that will last for years.
How to Patch and Repair Damaged Bricks
If you intend to paint your bricks, you must first repair any damaged surfaces. This will make the paint surface smooth and professional. Before starting the repair work, you should clean the brick surface. Then, follow these short steps to repair the damaged bricks:
- Remove any loose mortar or debris from the damaged area with a wire brush or chisel.
- Wet the area with a damp sponge or cloth to prepare it for the repair material.
- Mix a small amount of mortar repair material according to the manufacturer’s instructions. You can find this material at any hardware store.
- Apply the repair material to the damaged area using a trowel or putty knife. Ensure that the material is evenly distributed and covers the entire damaged area.
- Smooth the surface with a trowel or putty knife to create a flat and level surface.
- Allow the repair material to dry completely, as directed by the manufacturer.
- Once the repair material is dry, paint the bricks. The repaired area should blend seamlessly with the rest of the surface, giving you a professional-looking finish.
Remember, taking the time to repair any damaged areas properly will ensure that your painted bricks look their best and last for years to come.
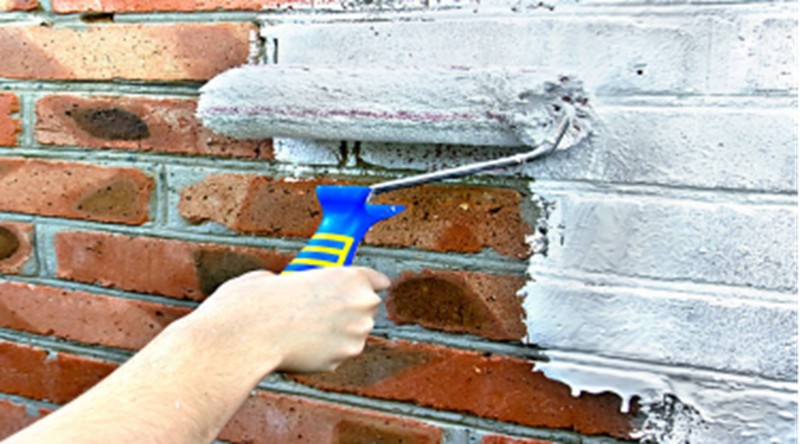
Techniques for Painting Bricks
A few techniques can help you achieve a professional and polished look when painting bricks. First, it’s essential to start with clean and dry bricks. Next, use a wire brush or pressure washer to remove dirt, grime, or loose mortar. You can begin painting once your bricks are clean and dry.
The Paintbrush/Roller Technique:
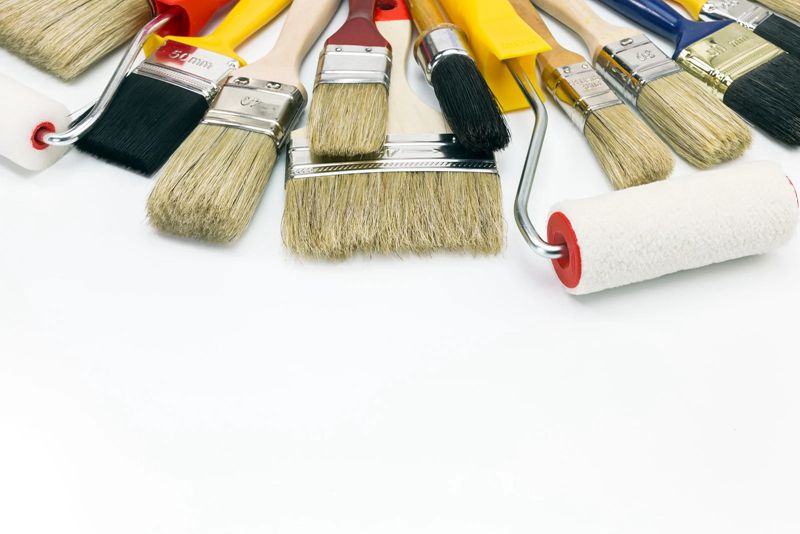
One popular method for painting bricks is to apply the paint with a roller or a paintbrush. This technique is time-consuming but gives you more control over the paint application.
For example, if you’re using a paintbrush, paint the mortar joints with a small brush with stiff bristles, then move on to the bricks with a larger brush. This will keep paint from getting on the mortar joints.
The Paint Sprayer Technique:
Another technique for painting bricks is to use a sprayer. This method is quicker than using a paintbrush or roller but also messier.
If you use a sprayer, cover any nearby surfaces to avoid overspray. Again, practice on a small, inconspicuous area first to get a feel for the sprayer and the paint.
Using high-quality paint designed for masonry surfaces is essential regardless of your chosen technique. This will help ensure that your painted bricks look for a long time. You can achieve a professional look for your painted bricks with patience and practice.
Tips for Achieving a Professional Look on Your Bricks
Achieving a professional look with brick painting may seem difficult, but it is achievable with the proper techniques and tools. Below are some tips to help you achieve that professional look you aim for.
Always Thoroughly Clean the Surface Before Painting
Cleaning the brick’s surface makes the paint stick better and ensure a smoother finish. Use a power washer or wire brush to remove dirt, dust, or loose paint from the surface.
Use the right paint and tools for the job.
Select a high-quality exterior paint designed specifically for masonry surfaces. This will ensure that your paint job will last longer and withstand the elements.
Use a roller or sprayer for larger areas, and for smaller or difficult-to-reach areas, use a brush. Painter’s tape is also useful for protecting areas you don’t want to paint, such as window frames, doors, and fixtures.
Paint In the Right Conditions and Take Breaks
Avoid painting in extreme heat or cold, as this can interfere with the drying process and result in a less-than-perfect finish.
Also, avoid painting in direct sunlight, which can cause the paint to dry too quickly and cause uneven coverage. Before adding the next coat of paint, let the previous one completely dry. When necessary, take breaks to prevent becoming tired.
Frequently Asked Questions
What is the Best Way to Clean Painted Brick?
Clean your freshly painted bricks with warm water and mild soap (such as dishwashing liquid). Be sure not to use harsh chemicals or abrasive scrubbers, as this could cause damage that will need repair later on. If you have any cracks or chips in your brickwork after painting, fill them with a mortar mix made of Portland cement, sand, and water and let it dry.
How Long Does it Take to Paint Brick?
The size of the surface and the number of coats needed will affect how long it takes to paint brick. We advise giving the paint at least 2 hours to dry between coats.
What are Some Common Tips for Maintaining Painted Brick Surfaces?
Regular cleaning is required to keep the painted brick surface looking new. Use a soft-bristle brush or a pressure washer to remove dirt and grime. Also, touching up small chips or cracks in the paint can help prevent further damage and keep the painted surface looking good.
Final Words
Painting brick is a great way to update the look of your home, but it can be difficult for beginners. You should also know what paint works best on bricks, how long each coat should be allowed to dry before applying another, and the proper tools.
With the tips and tricks provided in this article, you’ll be able to achieve a professional-looking result in 2023. We hope this guide makes your brick painting DIY project easier.
If you have any questions about painting your bricks, kindly leave them in the comments; we’ll be happy to answer them.