

Tiles are a common fixture in most homes, especially in bathrooms and kitchens. They are durable, easy to clean, and come in a variety of colors and designs. However, over time, tiles can become outdated or damaged, making it necessary to replace them, which can be an expensive and time-consuming process. Luckily, painting your tiles is a cost-effective and straightforward solution to transform your space.
Painting your tiles is an affordable DIY project that can help you revamp your home quickly and easily. Whether you want to change the color of your tiles, hide some imperfections, or add a personal touch to your space, painting your tiles is an excellent option that can save you both time and money.
However, before you start painting your tiles, there are some essential steps you need to follow to ensure the best results. In this article, we’ll provide you with a step-by-step guide on how to paint your tiles, including the materials you’ll need, the preparation steps, and the painting process itself. By following these simple steps, you can achieve a beautiful, professional-looking finish and completely transform the look of your tiles without breaking the bank.
Table of Contents
Important Tips For Getting A Perfect Finish When Painting Tiles
Achieving a perfect finish when painting tiles can be challenging, but by following a few tips and tricks, you can ensure a beautiful, professional-looking result. Here are some tips to help you get a perfect finish when painting tiles:
- Prepare the surface properly:As mentioned earlier, preparing the surface properly is critical for getting a perfect finish. This involves cleaning the tiles thoroughly and using sandpaper or a deglosser to rough up the surface to ensure the paint adheres well.
- Use the right paint:Using the right type of paint is also crucial. Epoxy paint, acrylic paint, or specialty tile paint are all options that can work well for painting tiles. Be sure to follow the manufacturer’s instructions carefully to ensure the best results.
- Use a primer:Using a primer before applying the paint can help improve the adhesion of the paint to the tiles, resulting in a smoother and more durable finish.
- Apply multiple thin coats:Instead of applying one thick coat of paint, it’s best to apply multiple thin coats of paint, allowing each coat to dry completely before applying the next. This will help prevent drips, runs, or uneven patches and ensure a smooth and even finish.
- Seal the paint:Once the paint has dried completely, it’s essential to seal it with a clear coat of sealant to protect the paint from chipping, peeling, or fading. A clear, water-resistant sealant can also help make the surface easier to clean.
By following these tips, you can achieve a perfect finish when painting your tiles and completely transform the look of your space.
A Comprehensive Guide To Painting Tiles: Easy Steps For A Perfect Finish
Painting tiles can be an effective and cost-efficient way to update the look of a bathroom, kitchen, or any other tiled surface. However, it’s important to follow the proper steps to ensure the paint adheres properly and lasts for a long time. Here are the steps to follow if you want to paint your tiles to perfection:
Step 1: Clean the tiles
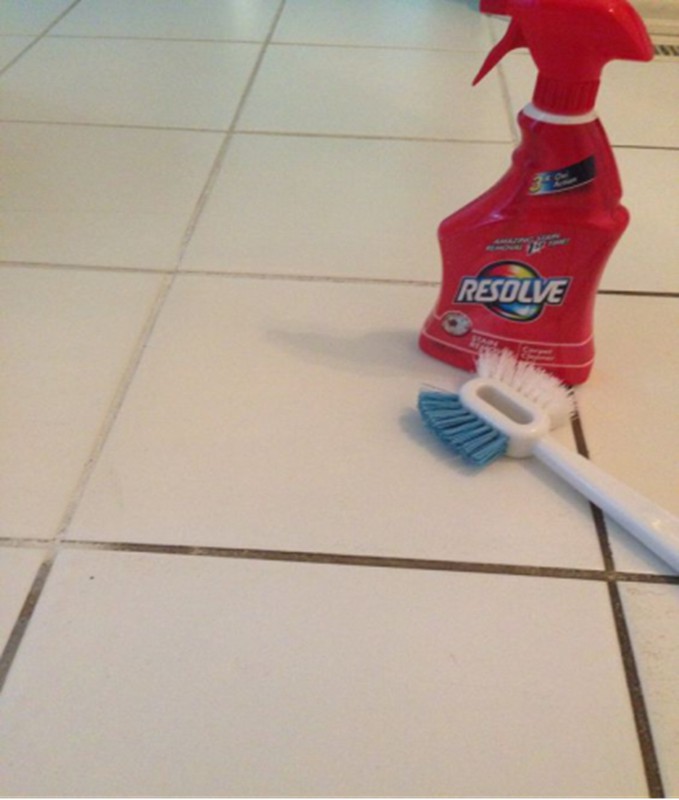
Cleaning the tile surface is an essential step when preparing to paint it. A clean tile surface will allow the paint to adhere better to the surface, ensuring a smoother finish and a longer-lasting paint job. Any dirt, grease, or debris on the tile surface can prevent the paint from sticking properly, causing it to peel or flake over time. Here are some steps to follow when cleaning tile surfaces:
- Remove any loose debris or dirt from the surface. Use a broom or vacuum cleaner to remove any loose dirt or debris from the tile surface.
- Prepare a cleaning solution e.g a mixture of water and a mild detergent in a bucket or other appropriate cleaning solvent. Avoid using harsh chemicals, as they can damage the tile surface.
- Apply the cleaning solution to the tile surface. Use a sponge or mop to apply the cleaning solution to the tile surface. Make sure to apply it evenly and thoroughly.
- Scrub the tile surface. Use a scrub brush or a scrub pad to scrub the tile surface, paying extra attention to any areas with grime or stains. Scrub the grout lines as well, as they can collect dirt and grime.
- Rinse the tile surface. Use clean water to rinse the tile surface thoroughly. Make sure to remove all the cleaning solution and dirt.
- Dry the tile surface. Use a clean towel or let the surface air dry. Make sure the surface is completely dry before proceeding with the next step.
Following these steps will ensure that the tile surface is properly cleaned and ready for painting. It’s important to take the time to clean the surface thoroughly, as any dirt or debris left on the surface can affect the adhesion of the paint.
To see a physical demonstration of the process, you can check this video on YouTube:
Step 2: Sand the tiles
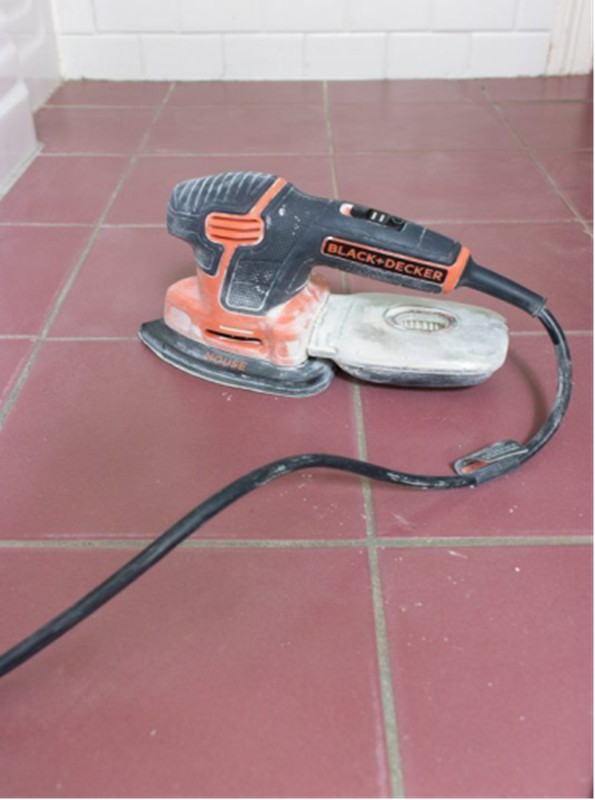
The next step after properly cleaning the tiles is sanding. Sanding tiles is an important step when preparing to paint them. Sanding the tile surface before painting it is important for several reasons. First, it helps to create a rougher surface for the paint to adhere to. Tiles are often smooth and glossy, which can make it difficult for paint to stick properly. By sanding the surface, you create a texture that allows the paint to bond more securely to the tiles. Second, sanding can help to remove any existing finishes or sealers that may be present on the surface. If these are not removed, the paint may not adhere properly or may begin to peel or chip over time. Finally, sanding can also help to smooth out any rough spots or imperfections on the tile surface, resulting in a more even and professional-looking paint job.
Here are the steps you should follow when sanding tiles for painting:
- Choose the right sandpaper. For tiles, use a fine-grit sandpaper, such as 220 grit. This will provide enough texture to help the paint adhere, without damaging the surface of the tiles.
- Sand the tiles. Start by sanding the tiles lightly in a circular motion, making sure to cover the entire surface. Be careful not to sand too hard or too much in one spot, as this can damage the tiles.
- Wipe off the dust. Once you have sanded the tiles, wipe them down with a clean, damp cloth to remove any dust or debris. Allow the tiles to dry completely before painting.
Sanding tiles when preparing to paint them is an important step that should not be skipped. By following these steps, you can ensure that your paint job will last and look great for years to come.
You can watch this video on YouTube to see how to properly sand tiles:
Step 3: Apply a primer
Applying a primer is another essential step to follow when you are painting tiles to ensure that the paint will adhere to the surface properly. It’s important to prime the tile surface before painting because it creates a surface that the paint can adhere to properly. Tile surfaces are often smooth and non-porous, which can make it challenging for the paint to stick to them. A primer helps to create a layer between the tile surface and the paint, providing a better surface for the paint to bond to. Without a primer, the paint may not adhere well, resulting in chipping or peeling. Additionally, a primer can also help to seal any cracks or imperfections in the tile surface, creating a smoother and more even surface for the paint.

Here are some steps for you to follow when applying a primer on tiles before painting:
- Choose the right primer: There are several types of primers available, but it’s essential to choose a primer that is suitable for tiles. Check the label of the primer to ensure that it’s recommended for use on tiles.
- Apply the primer: Using a paintbrush or roller, apply the primer to the tiles. Make sure to cover the entire surface of the tiles and apply the primer evenly. Let the primer dry according to the manufacturer’s instructions.
- Sand the primer: Once the primer is dry, use sandpaper to lightly sand the surface of the tiles. This will help to create a smooth surface for the paint to adhere to.
- Clean the primed surface. After sanding the primed surface, you should clean it up before going ahead to apply the paint.
By following these steps, you can ensure that your tiles are properly prepared for painting and that the paint will adhere to the surface properly. Applying a primer is a crucial step in the process, and it will help to ensure that your painted tiles look great and last for a long time.
If you want to see how this process is carried out, you can check out the following video on YouTube:
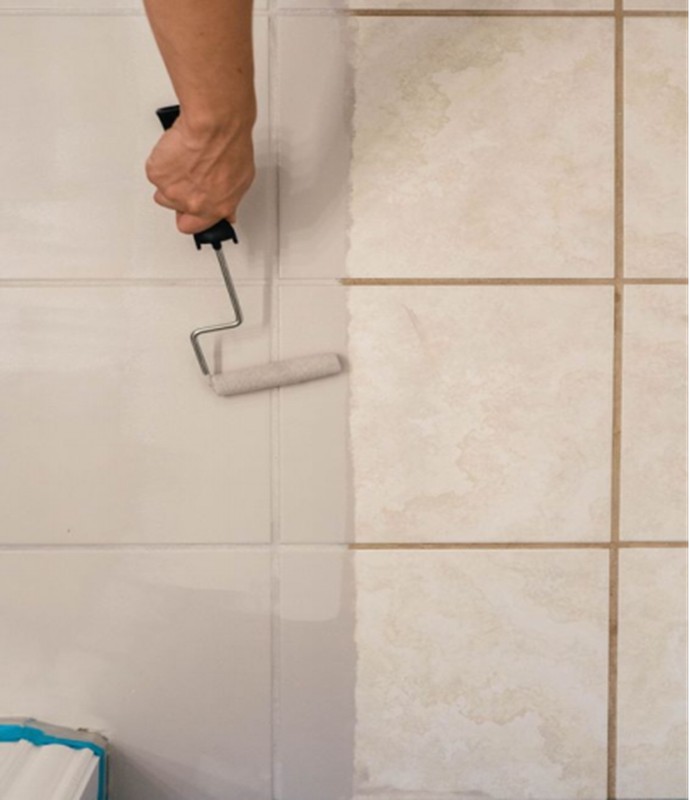
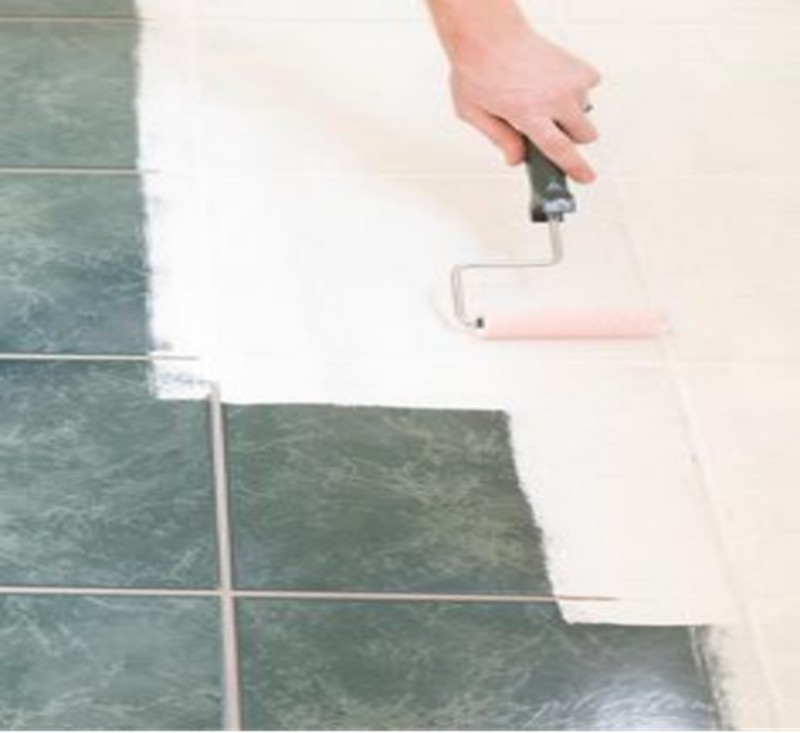
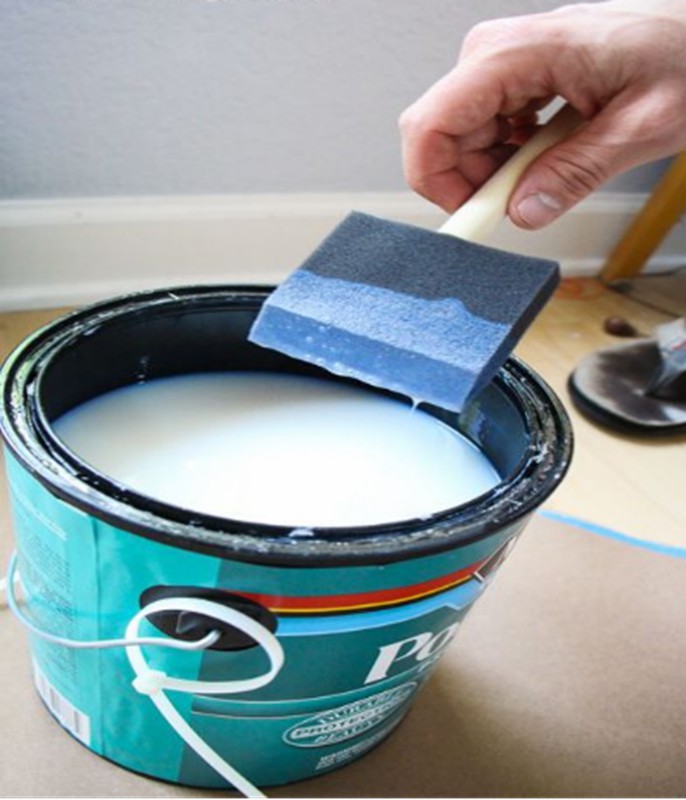
Step 4: Paint the tiles
After priming the surface of the tiles properly, the next thing is to apply the paint. Just as mentioned earlier, you should avoid applying a very thick coat of paint at once. You should apply the paint in multiple thin coats and allow each coat to dry before applying the next. This is to prevent the dripping of paint and ensure a perfect finish. Here are the steps when applying paint to the primed surface of the tiles:
- Choose a paint that is specifically designed for tile surfaces, such as ceramic or porcelain tile paint. It should be durable, moisture-resistant, and able to withstand high temperatures.
- Using a brush or roller, apply a thin coat of paint to the tiles. Allow this coat to dry completely before applying a second coat. Depending on the color of the paint and the condition of the tiles, you may need to apply more coats.
- Allow the paint to dry. Once you’ve applied all the coats of paint, allow the tiles to dry completely. This can take several hours or even overnight.
By following these steps, you’ll be able to successfully paint your tiles after cleaning and priming have been done. Just make sure you choose the right type of paint for the job and follow the manufacturer’s instructions carefully.
Still in need of some guidance on how to paint your tiles? This video on Youtube will surely be of help:
Step 5: Apply a sealant
A sealant (also known as a sealer) is a protective coating that forms a barrier between a surface and its environment. It is designed to prevent moisture, dirt, and other contaminants from penetrating the surface, which can cause damage, stains, and discoloration. Sealants can be used on a variety of surfaces, from tiles and grout in bathrooms to concrete floors and countertops. They offer several benefits, including protection against moisture, stains, and fading, as well as extending the lifespan of a surface. By providing an effective barrier, a sealant helps to maintain the appearance and functionality of a surface, making it a useful tool for both residential and commercial settings.
In the case of painted tiles, the sealant protects against moisture and prevents the growth of organisms (such as algae and fungi) that can damage the integrity and aesthetics of the paint. Here are the steps you can follow to apply a sealant after you have finished applying pain to the tiles:
- Allow the paint to dry completely. It is recommended to wait at least 24 hours before applying a sealant.
- Choose a sealant that is appropriate for your tiles. There are different types of sealants available in the market, such as water-based or solvent-based sealants.
- Apply the sealant evenly on the tiles using a brush or a roller. Make sure that the sealant covers the entire surface of the tiles.
- Allow the sealant to dry completely. This may take anywhere from a few hours to a day, depending on the type of sealant used.
- Apply a second coat of sealant if necessary. This will ensure that the tiles are properly protected.
It is important to note that the application process may vary depending on the type of sealant used. Always refer to the manufacturer’s instructions for proper application and drying times.
If you want to see how to apply a sealant correctly after painting your tiles, check out this video on YouTube:
Conclusion
Painting tiles can be a fun and cost-effective way to give your home a fresh and updated look. With the right tools and techniques, anyone can transform their dull and outdated tiles into a stunning and modern masterpiece. It is important to thoroughly clean and prime the tiles before painting to ensure that the paint adheres properly. Choosing the right type of paint is also essential to ensure that the paint is durable and long-lasting. Remember to take your time and follow the proper steps to achieve the best results. With a little bit of patience and creativity, you can completely transform your space and create a beautiful new look.